In this tutorial, we will describe how to migrate AWS EC2 instance from one region to another.
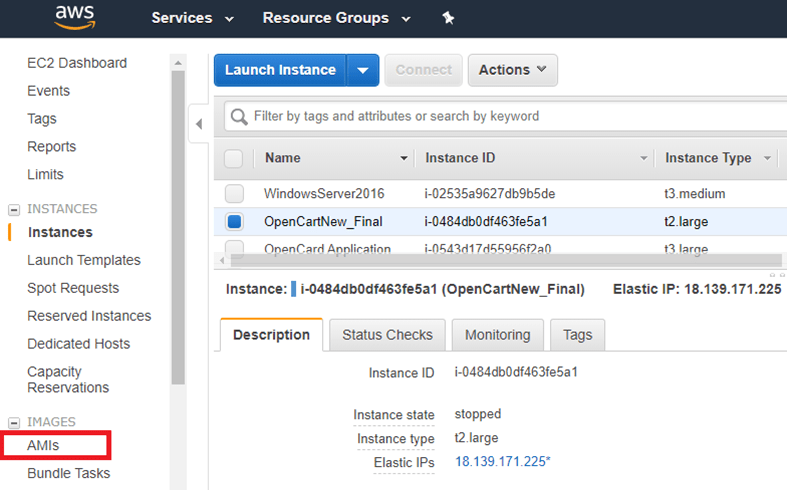
Step 1: Create AMI from the existing EC2 instance.
In order to migrate EC2 instance, we need to create the image (AMI) of the existing instance. To do so, we need to stop the instance.
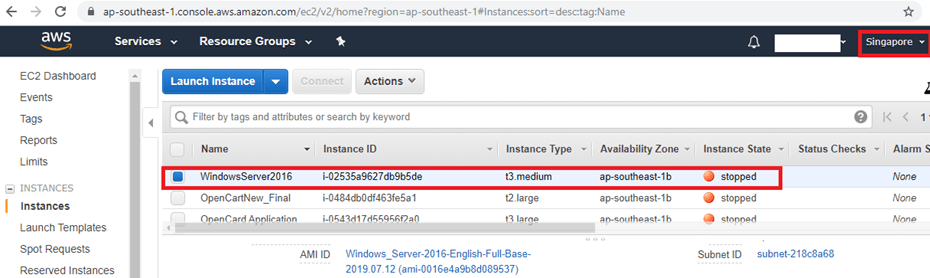
Note: We can create AMI when instance is in running state but file system integrity on the created image cannot be guaranteed. So, stopping the EC2 instance is recommended.
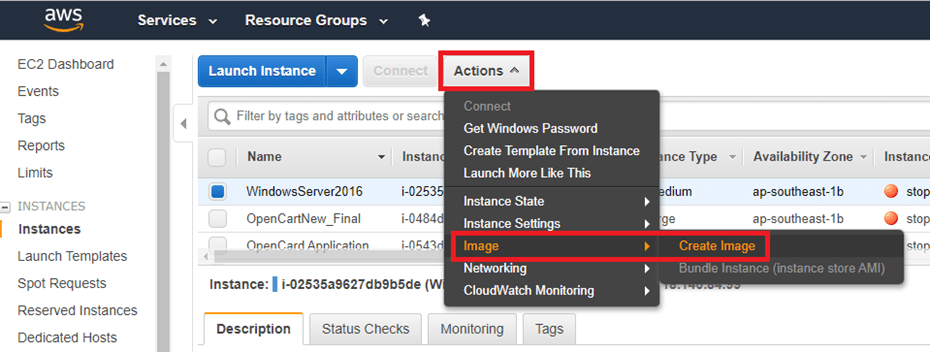
Once the EC2 instance is stopped, we will create the AMI of the instance. To do so, select the instance and click on Actions> Image > Create Image.
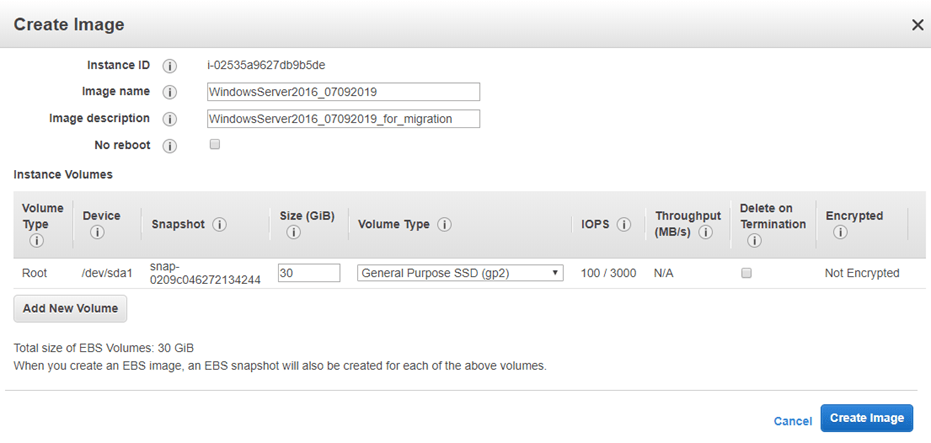
Next, enter image name and details, check the volume details and click on Create Image.
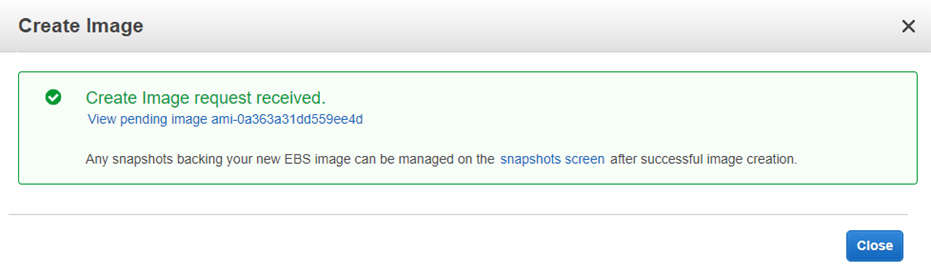
The image creation will be started as shown below.
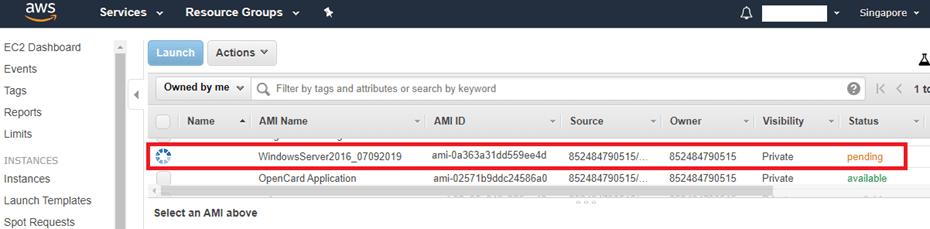
Next, go to Images section and click on AMIs to check the status of the AMI.
We can see that the image creation is in pending state which means image is still creating.
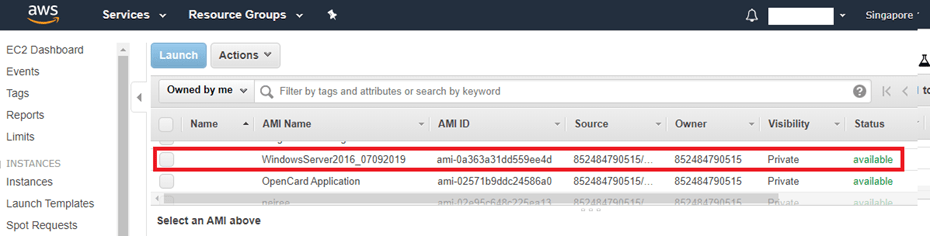
Wait for few minutes and based on size of the VM, image creation will take anywhere between 15 minutes to few hours. Now we see that the image creation is complete and available.
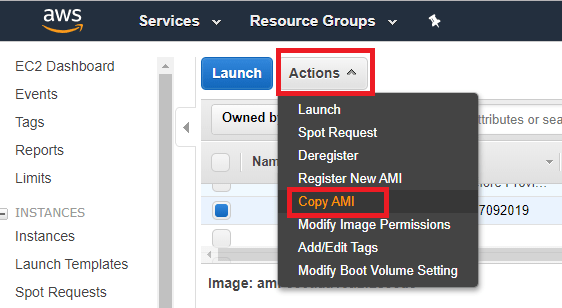
Step 2: Copy AMI from origin to destination region.
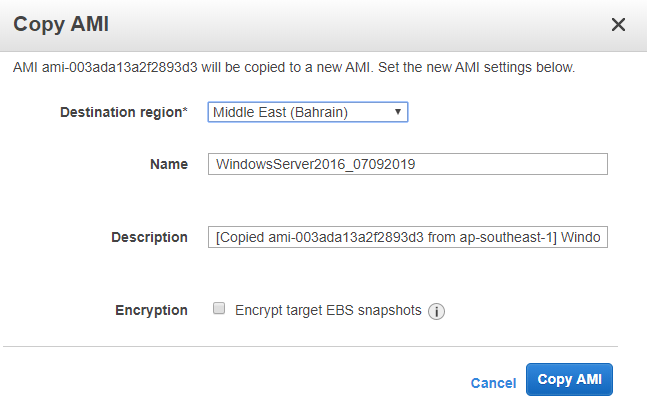
Next, we will copy the image to the another AWS region. To do so, select the image and click on Actions > Copy AMI.
Next, select the destination region, which in our case is Bahrain. We have option to change the AMI name but we will keep the same name in both regions. Next, click on Copy AMI to start copying the AMI to the destination region.
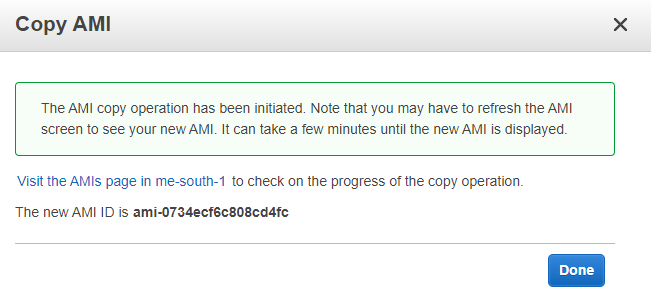
The AMI copy is started as shown below.
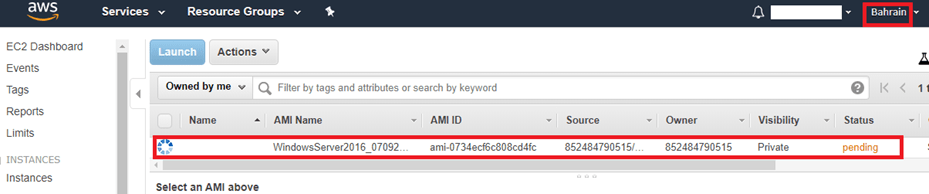
Next, we will change our region to the destination region to verify the copied AMI as shown below.

Now, we see that the copy is still in progress. We will wait for the copy to complete.
Step 3: Create instance from AMI in destination region.
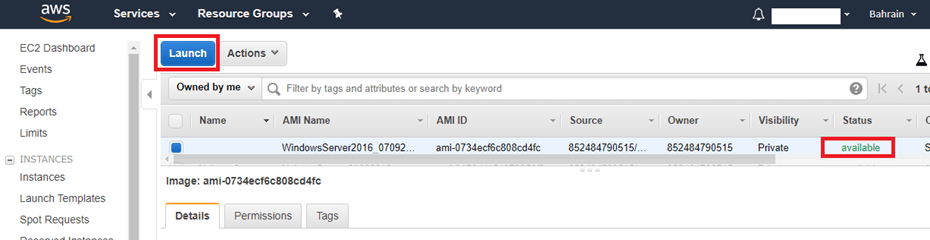
In few minutes, the copy is completed. Once copy is complete, to create the VM, we will select the AMI and click on Launch.
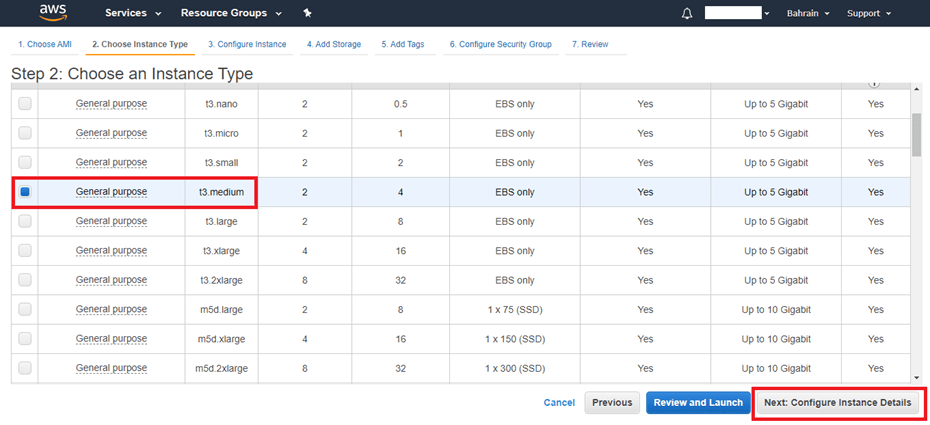
Next, select the instance type and click on Configure instance details.
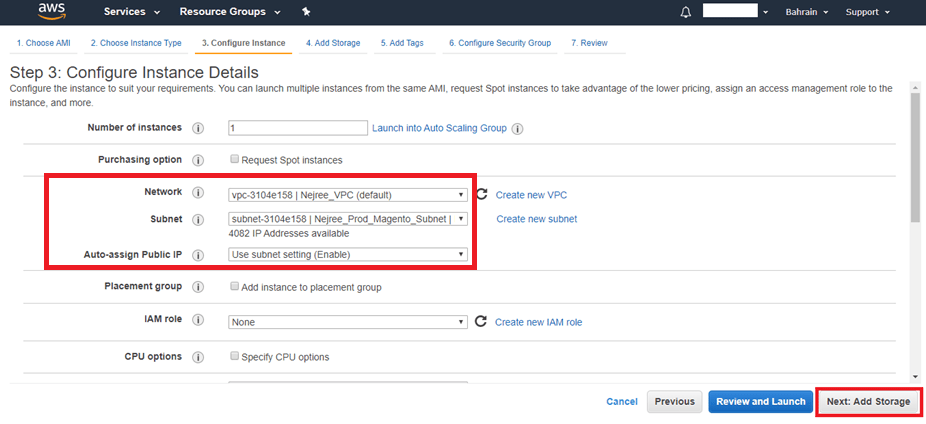
Next, configure the instance details like network, subnet, IPs, etc. and click on Next to proceed.
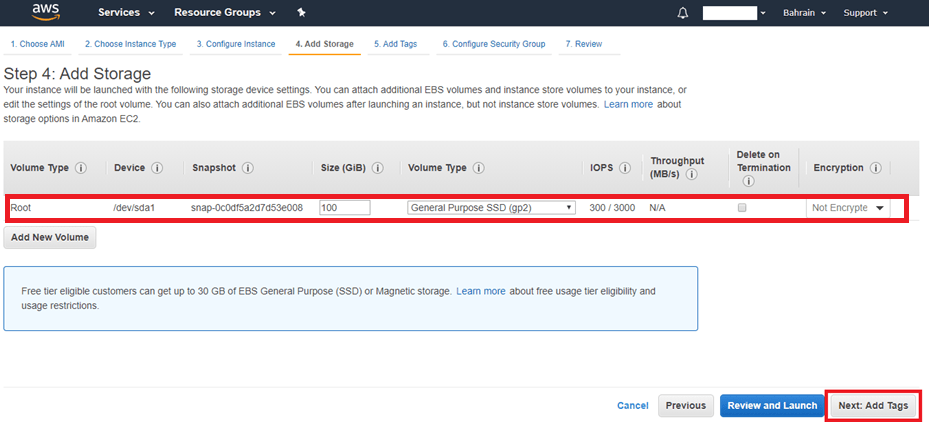
Next, verify storage details and click on Next to proceed.
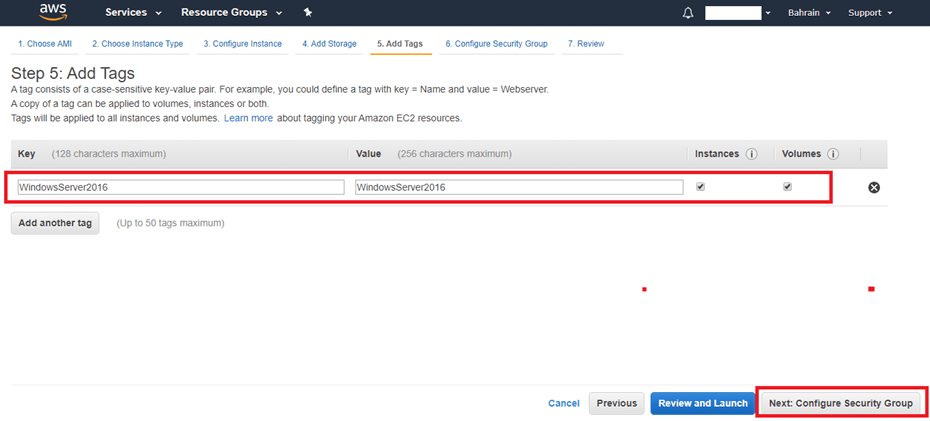
Next, add Tags and click on Next to proceed.
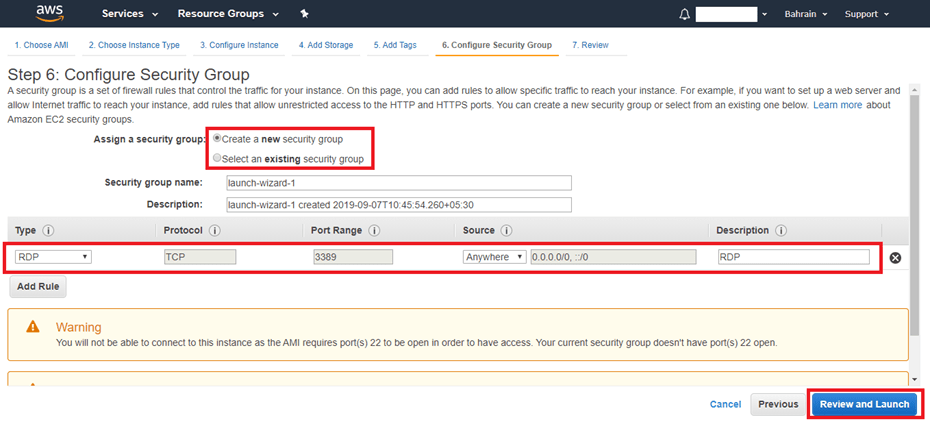
Next, configure Security Groups and click on Review and Launch to launch the VM.
Next, review the instance details which is ready to be created and click on Launch.

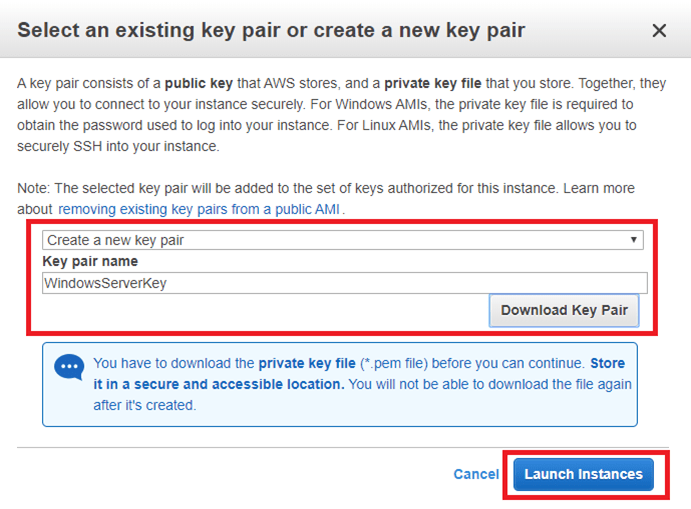
Next, create the Key Pair which will be used for logging into the server and DOWNLOAD the key pair. Finally launch the instance.
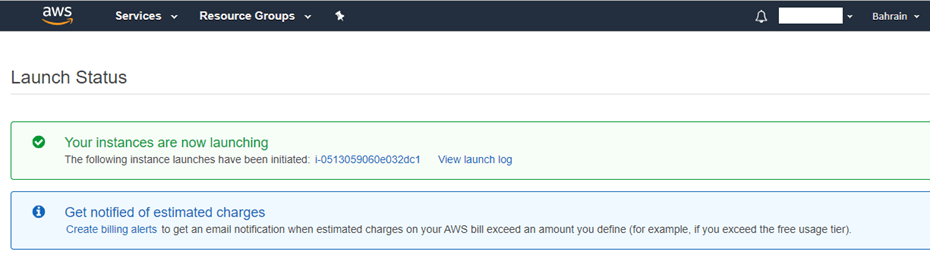
Next, we see the below screen which shows the instance id.
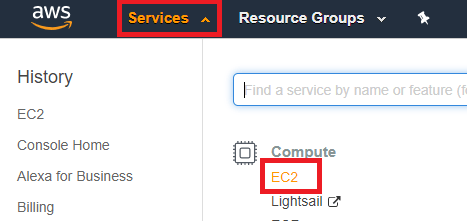
Next, go to Service > EC2 section to verify the created EC2 instance.
Next, we see that the instance is finally created and is running as shown below.
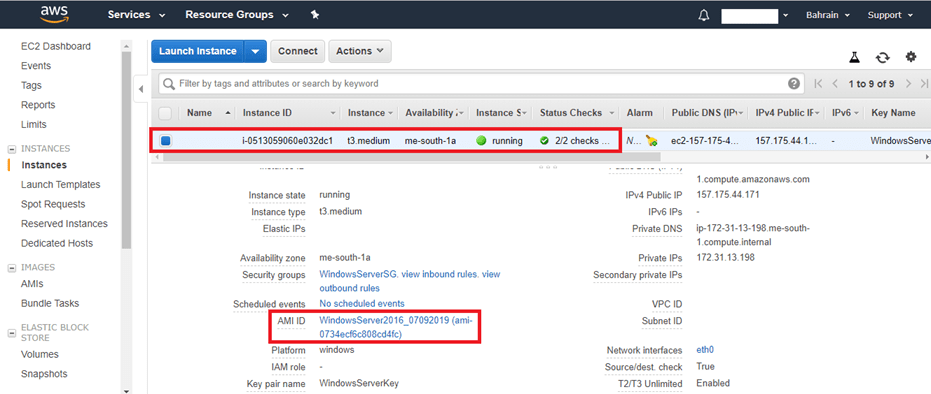
Now, copy the IPv4 Public IP to connect to the VM.
As we have launced a Windows instance, we need to convert the downloaded key to password to connect to the VM by following the below steps.
- In the Amazon EC2 console, select the instance, and then choose Connect.
- In the Connect To Your Instancedialog box, choose Get Password (it will take a few minutes after the instance is launched before the password is available).
- Choose Browseand navigate to the private key file you created when you launched the instance. Select the file and choose Open to copy the entire contents of the file into the Contents
- Choose Decrypt Password. The console displays the default administrator password for the instance in the Connect To Your Instancedialog box, replacing the link to Get Password shown previously with the actual password.
- Record the default administrator password, or copy it to the clipboard. You need this password to connect to the instance.
- Choose Download Remote Desktop File. Your browser prompts you to either open or save the .rdp file. Either option is fine. When you have finished, you can choose Closeto dismiss the Connect To Your Instance dialog box.
- If you opened the .rdp file, you’ll see the Remote Desktop Connectiondialog box.
- If you saved the .rdp file, navigate to your downloads directory, and open the .rdp file to display the dialog box.
- You may get a warning that the publisher of the remote connection is unknown. You can continue to connect to your instance.
- When prompted, log in to the instance, using the administrator account for the operating system and the password that you recorded or copied previously.
This completes the AWS EC2 migration. Enjoy using AWS Cloud!
The other AWS tutorials are as follow: