Amazon VPC and Subnet
Amazon Virtual Private Cloud is the networking layer for Amazon EC2. This enable us to launch AWS resources into a virtual network that we define. This virtual network closely resembles a traditional network that we operate in your own data center, with the benefits of using the scalable infrastructure of AWS.
A subnet is a range of IP addresses in our VPC. We can launch AWS resources into a specified subnet, public subnet for internet resources and private subnet for private resources.
In this tutorial, we will describe how to create VPC and Subnet in AWS using GUI and AWS CLI.
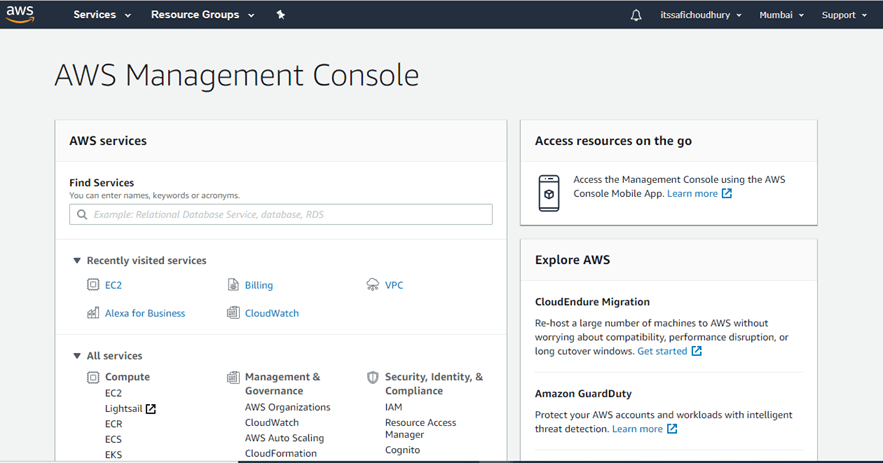
First, we will login to the AWS console with the existing credentials or create a new account. (For creating new account follow this guide).
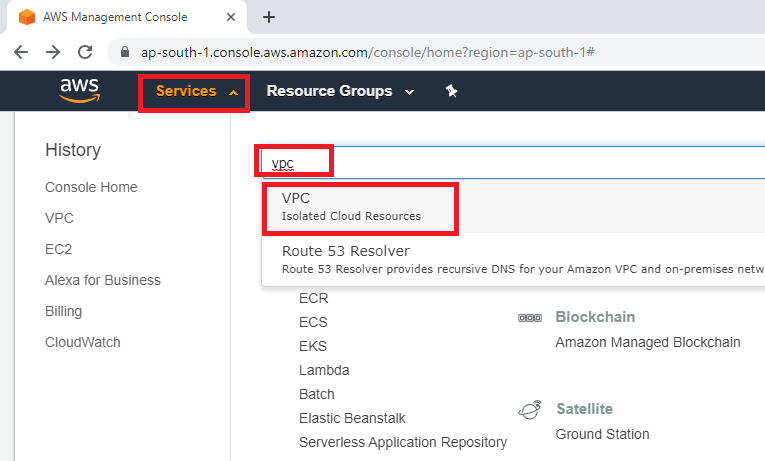
Next, we will search VPC in services and select VPC to go to the console.
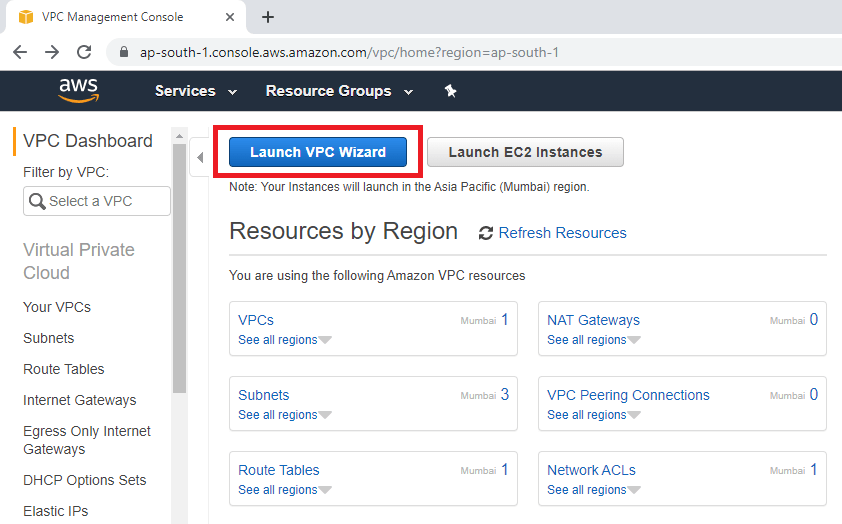
Now, we will launch the VPC launch wizard to start the process.
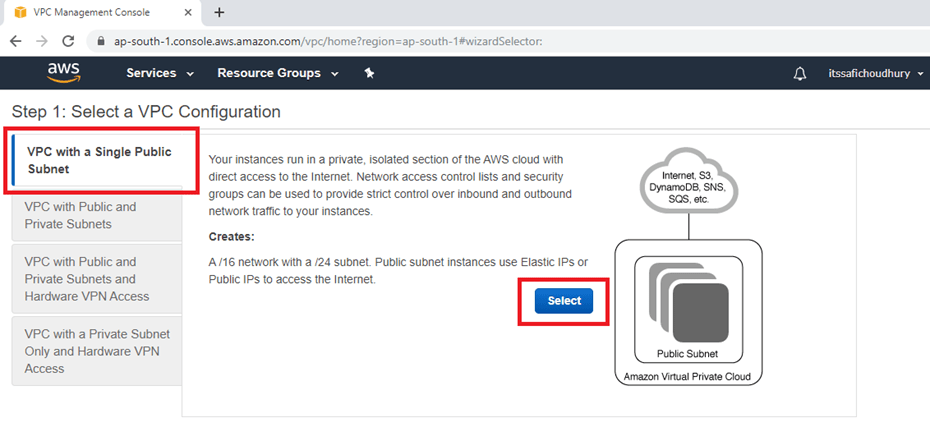
Then we will select the type of VPC we will create based on our requirement and click on select to proceed.
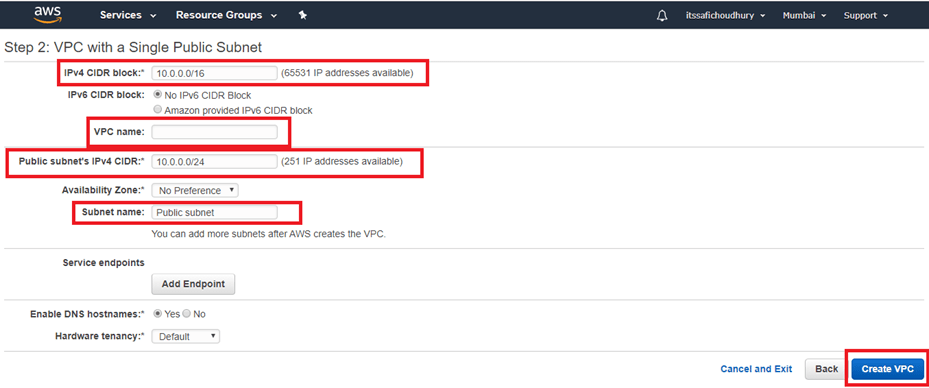
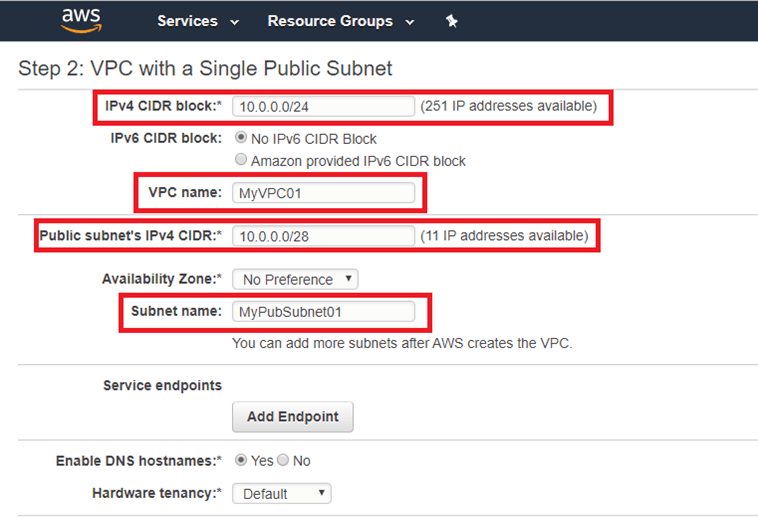
Next, we need to enter the IPv4 CIDR block, VPC name, Public subnet IPv4 CIDR and subnet name as per our need and click on Create VPC to proceed.
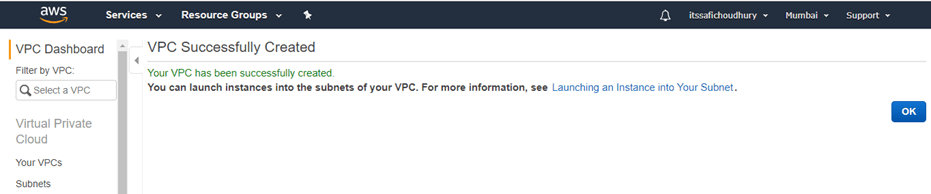
Now our VPC is successfully created based on our requirement.
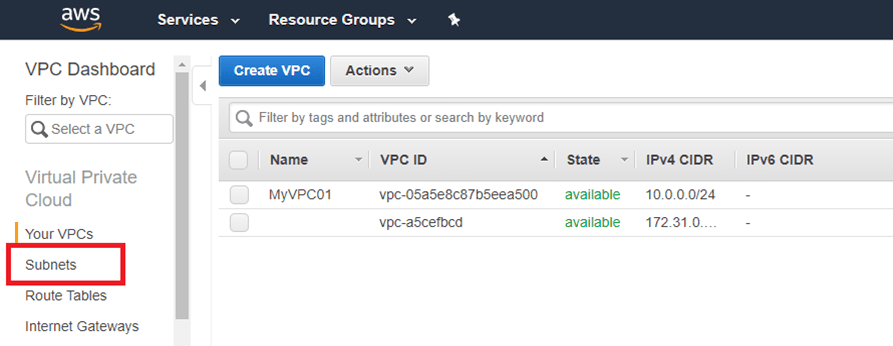
Finally, we will verify the created VPC by going to VPC section.

We see that the newly created VPC is available in the VPC console, And, to verify subnet we will go to the subnet section.
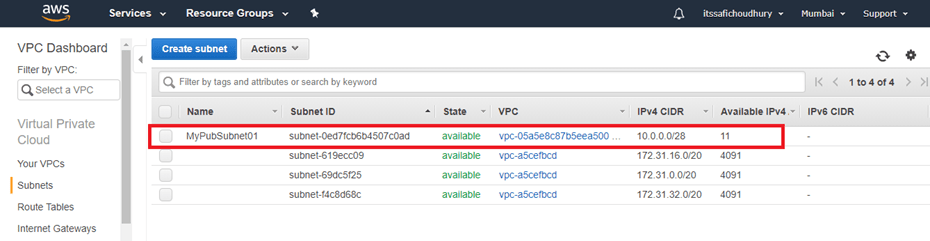
We see that the newly created subnet is also available in the subnet cosnole. This completes the VPC and subnet creation tutorial.
Next, we will see how to create the same from the AWS CLI.
The following example uses AWS CLI commands to create a nondefault VPC with an IPv4 CIDR block, and a public and private subnet in the VPC. To begin, we must first install and configure the AWS CLI. For more information, see Getting Set Up with the AWS Command Line Interface.
Step 1: Create a VPC and Subnets
The first step is to create a VPC and two subnets. This example uses the CIDR block 10.0.0.0/16 for the VPC, but you can choose a different CIDR block. For more information, see VPC and Subnet Sizing.
To create a VPC and subnets using the AWS CLI
- Create a VPC with a
10.0.0.0/16CIDR block.aws ec2 create-vpc --cidr-block10.0.0.0/16In the output that’s returned, take note of the VPC ID.
{ "Vpc": { "VpcId": "vpc-2f09a348", ... } } - Using the VPC ID from the previous step, create a subnet with a
10.0.1.0/24CIDR block.aws ec2 create-subnet --vpc-idvpc-2f09a348--cidr-block10.0.1.0/24 - Create a second subnet in your VPC with a
10.0.0.0/24CIDR block.aws ec2 create-subnet --vpc-idvpc-2f09a348--cidr-block10.0.0.0/24
Step 2: Make the Subnet Public
After we’ve created the VPC and subnets, we can make one of the subnets a public subnet by attaching an Internet gateway to our VPC, creating a custom route table, and configuring routing for the subnet to the Internet gateway.
To make our subnet a public subnet
- Create an Internet gateway.
aws ec2 create-internet-gatewayIn the output that’s returned, take note of the Internet gateway ID.
{ "InternetGateway": { ... "InternetGatewayId": "igw-1ff7a07b", ... } } - Using the ID from the previous step, attach the Internet gateway to your VPC.
aws ec2 attach-internet-gateway --vpc-idvpc-2f09a348--internet-gateway-idigw-1ff7a07b - Create a custom route table for our VPC.
aws ec2 create-route-table --vpc-idvpc-2f09a348In the output that’s returned, take note of the route table ID.
{ "RouteTable": { ... "RouteTableId": "rtb-c1c8faa6", ... } } - Create a route in the route table that points all traffic (
0.0.0.0/0) to the Internet gateway.aws ec2 create-route --route-table-idrtb-c1c8faa6--destination-cidr-block0.0.0.0/0--gateway-idigw-1ff7a07b - To confirm that our route has been created and is active, we can describe the route table and view the results.
aws ec2 describe-route-tables --route-table-idrtb-c1c8faa6{ "RouteTables": [ { "Associations": [], "RouteTableId": "rtb-c1c8faa6", "VpcId": "vpc-2f09a348", "PropagatingVgws": [], "Tags": [], "Routes": [ { "GatewayId": "local", "DestinationCidrBlock": "10.0.0.0/16", "State": "active", "Origin": "CreateRouteTable" }, { "GatewayId": "igw-1ff7a07b", "DestinationCidrBlock": "0.0.0.0/0", "State": "active", "Origin": "CreateRoute" } ] } ] }
- Create an Internet gateway.
- The route table is currently not associated with any subnet.
We need to associate it with a subnet in our VPC so that traffic from that subnet is routed to the Internet gateway.
- First, use the
describe-subnets
- command to get your subnet IDs. You can use the
--filter
- option to return the subnets for your new VPC only, and the
--query
- option to return only the subnet IDs and their CIDR blocks.
aws ec2 describe-subnets --filters "Name=vpc-id,Values=vpc-2f09a348" --query 'Subnets[*].{ID:SubnetId,CIDR:CidrBlock}'[
{
"CIDR": "10.0.1.0/24",
"ID": "subnet-b46032ec"
},
{
"CIDR": "10.0.0.0/24",
"ID": "subnet-a46032fc"
}
]- We can choose which subnet to associate with the custom route table, for example,
subnet-b46032ec. This subnet will be our public subnet.aws ec2 associate-route-table --subnet-idsubnet-b46032ec--route-table-idrtb-c1c8faa6
- We can choose which subnet to associate with the custom route table, for example,
- We can optionally modify the public IP addressing behavior of our subnet so that an instance launched into the subnet automatically receives a public IP address.
Otherwise, we should associate an Elastic IP address with your instance after launch so that it’s reachable from the Internet.
aws ec2 modify-subnet-attribute --subnet-id subnet-b46032ec --map-public-ip-on-launchThis completes the tutorial for VPC and subnet creation using AWS CLI. The other AWS tutorials are as follow: