Introduction: Learning Objectives
By the end of this chapter, you should be able to:
- Apply system, display, and date and time settings using the System Settings panel.
- Track the network settings and manage connections using Network Manager in Linux.
- Install and update software in Linux from a graphical interface.
NOTE: We will revisit all these tasks later, when we discuss how to accomplish them from the command line interface.
System, Display, Date and Time Settings
System Settings
The System Settings panel allows you to control most of the basic configuration options and desktop settings, such as specifying the screen resolution, managing network connections, or changing the date and time of the system.
For the GNOME Desktop Manager, one clicks on the upper right-hand corner and then selects the tools image (screwdriver crossed with a wrench or a gear). Depending on your distribution, you may find other ways to get into the settings configuration as well. You will also find variation in the menu layout between Linux distributions and versions, so you may have to hunt for the settings you need to examine or modify.
Click the image to view an enlarged version.

System Settings Menus
To get deeper into configuration, one can click on the Devices on the previous menu in order to configure items like the display, the keyboard, the printers, etc.
One can also click on the Users icon (which may be under Details) to set values for system users, such as their login picture, password, etc.

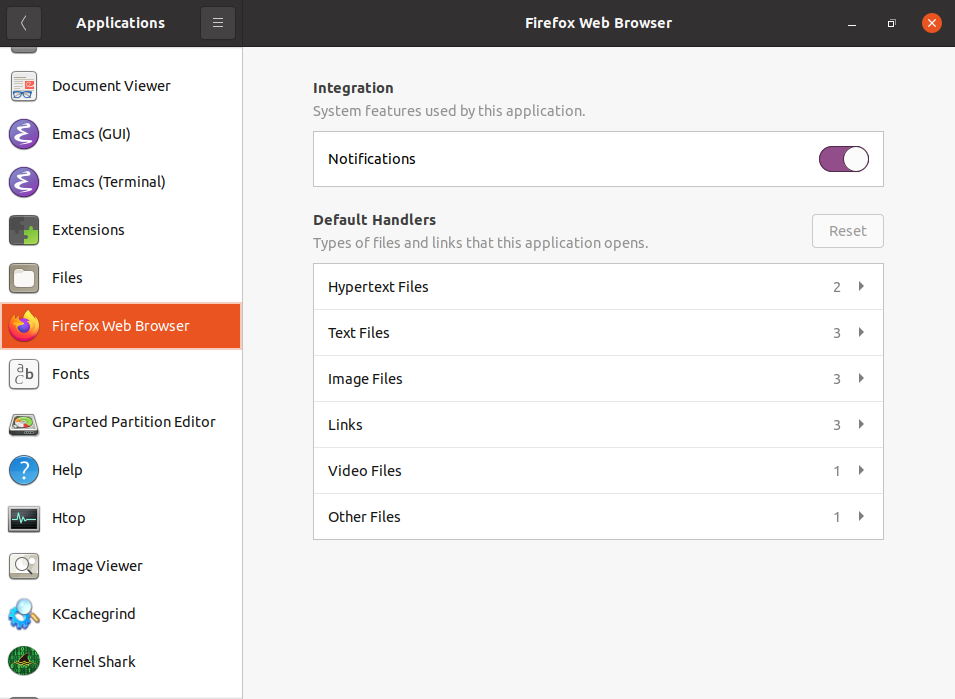
gnome-tweaks
A lot of personalized configuration settings do not appear on the settings menus. Instead, you have to launch a tool called either gnome-tweaks (or gnome-tweak-tool on older Linux distributions). We have not really discussed working at the command line yet, but you can always launch a program such as this by doing Alt-F2 and typing in the command. Some distributions have a link to the tweaks menus in the settings, but for some mysterious reason, many obscure this tool’s existence, and it becomes hard to discover how to modify even rather basic desktop attributes and behavior.
Important things you can do with this tool include selecting a theme, configuring extensions which you can get from your distribution or download from the Internet, control fonts, modify the keyboard layout, and set which programs start when you login.
The most recent GNOME versions have removed a lot of the functionality of gnome-tweaks; extensions now have to be configured using a new app called gnome-extensions-app. The reasoning for this is obscure.
The screenshot here is from a Red Hat system with quite a few extensions installed, but not all being used.
Display Settings
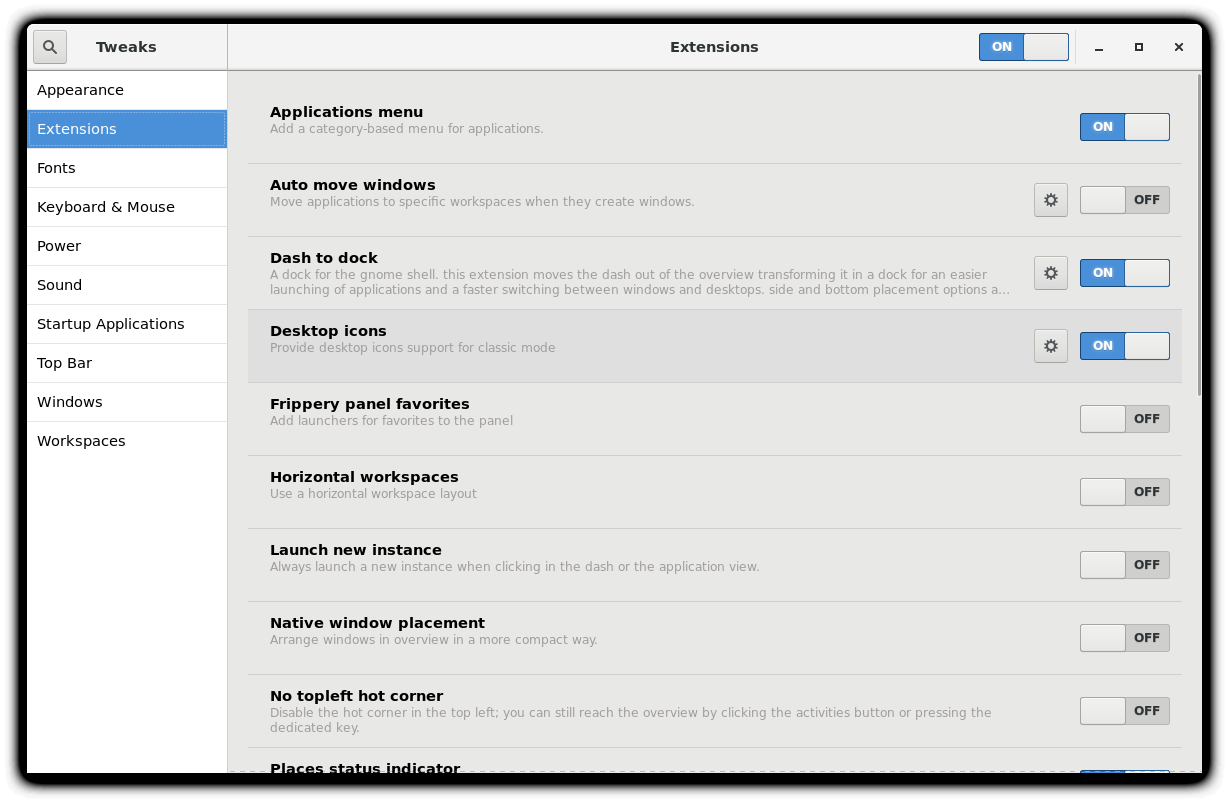
Clicking on Settings > Displays (or Settings > Devices > Displays) will expose the most common settings for changing the desktop appearance. These settings function independently of the specific display drivers you are running. The exact appearance will depend enormously on how many monitors you have and other factors, such as Linux distribution and particular version.
If your system uses a proprietary video card driver (usually from nVidia or AMD), you will probably have a separate configuration program for that driver. This program may give more configuration options, but may also be more complicated, and might require sysadmin (root) access. If possible, you should configure the settings in the Displays panel rather than with the proprietary program.
The X server, which actually provides the GUI, uses /etc/X11/xorg.conf as its configuration file if it exists; In modern Linux distributions, this file is usually present only in unusual circumstances, such as when certain less common graphic drivers are in use. Changing this configuration file directly is usually for more advanced users.
Setting Resolution and Configuring Multiple Screens
While your system will usually figure out the best resolution for your screen automatically, it may get this wrong in some cases, or you might want to change the resolution to meet your needs.
You can accomplish this using the Displays panel. The switch to the new resolution will be effective when you click Apply, and then confirm that the resolution is working. In case the selected resolution fails to work or you are just not happy with the appearance, the system will switch back to the original resolution after a short timeout. Once again, the exact appearance of the configuration screen will vary a lot between distributions and versions, but usually is rather intuitive and easy, once you find the configuration menus.
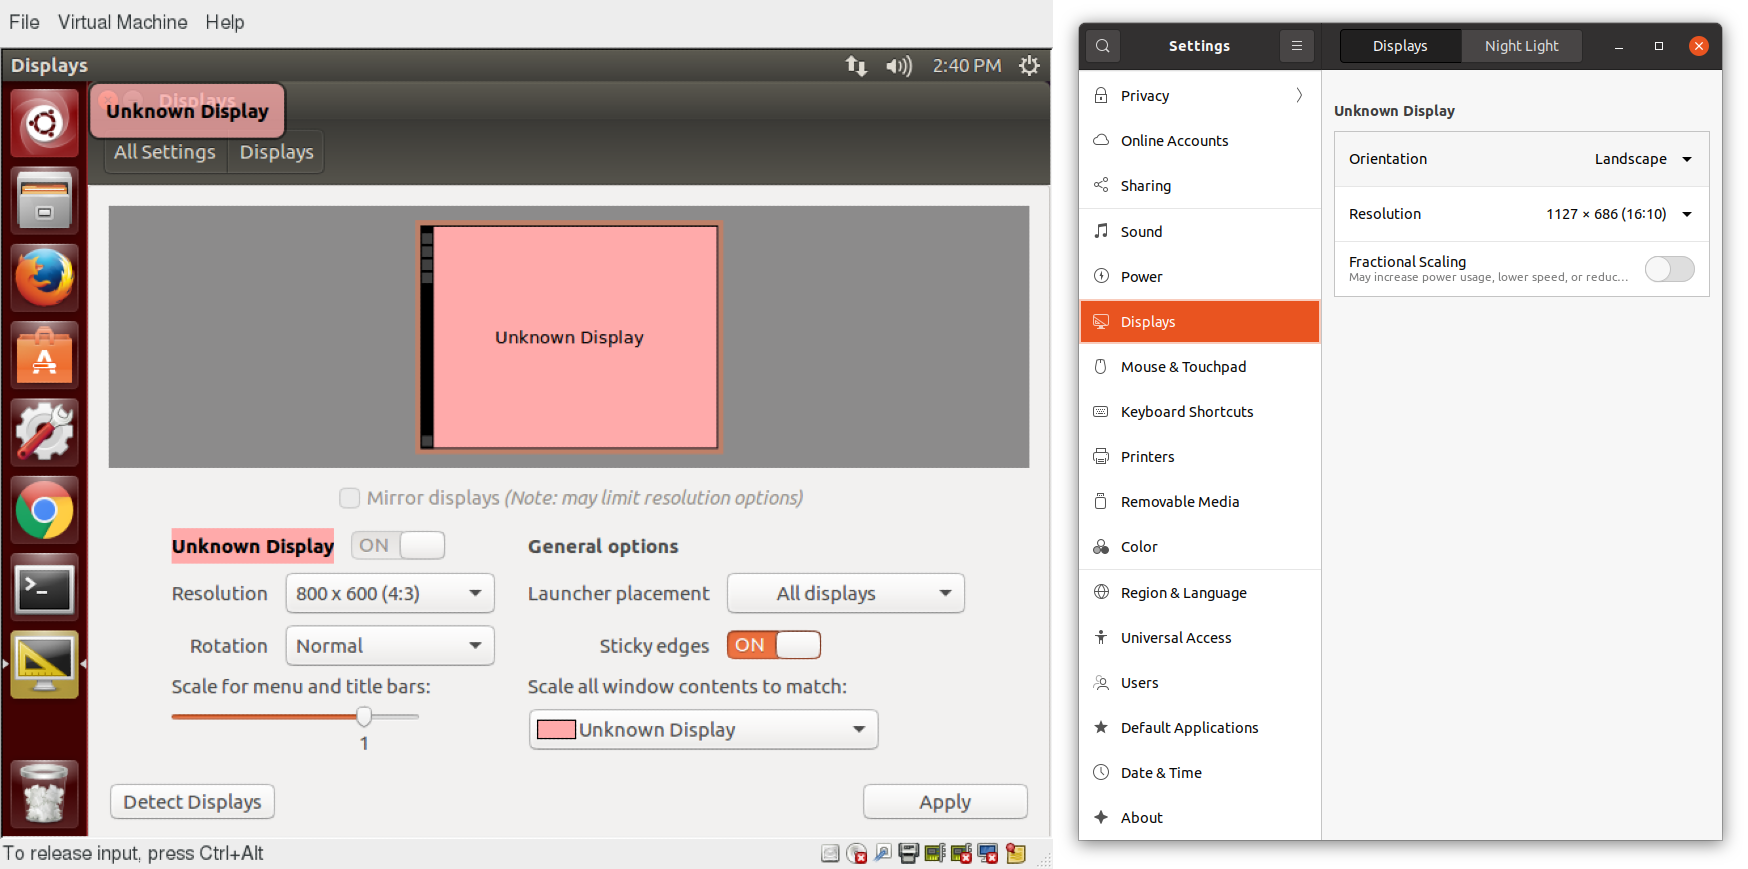
In most cases, the configuration for multiple displays is set up automatically as one big screen spanning all monitors, using a reasonable guess for screen layout. If the screen layout is not as desired, a check box can turn on mirrored mode, where the same display is seen on all monitors. Clicking on a particular monitor image lets you configure the resolution of each one, and whether they make one big screen, or mirror the same video, etc.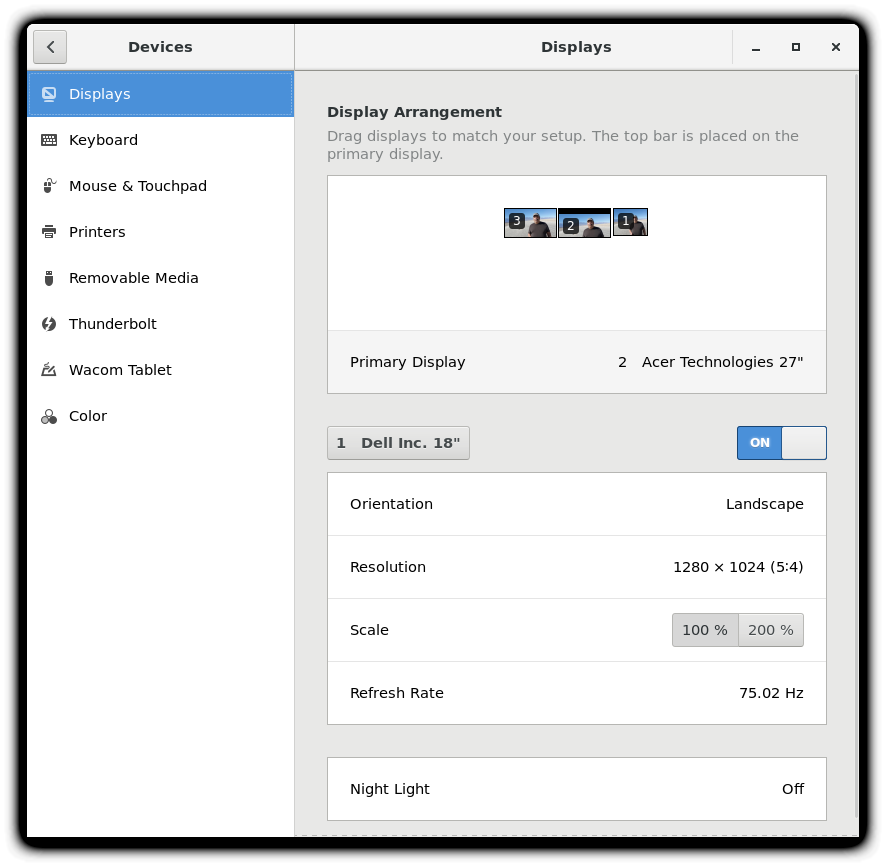
Date and Time Settings
By default, Linux always uses Coordinated Universal Time (UTC) for its own internal timekeeping. Displayed or stored time values rely on the system time zone setting to get the proper time. UTC is similar to, but more accurate than, Greenwich Mean Time (GMT).
If you click on the time displayed on the top panel, you can adjust the format with which the date and time is shown; on some distributions, you can also alter the values.
The more detailed date and time settings can be selected from the Date & Time window in the System Settings Menu.
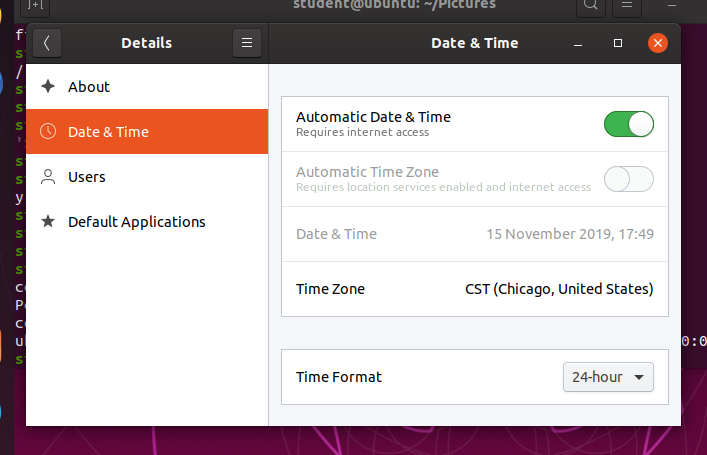
The “automatic” settings are referring to the use of Network Time Protocol (NTP), which we discuss next.
Network Time Protocol
The Network Time Protocol (NTP) is the most popular and reliable protocol for setting the local time by consulting established Internet servers. Linux distributions always come with a working NTP setup, which refers to specific time servers run or relied on by the distribution. This means that no setup, beyond “on” or “off”, is generally required for network time synchronization.

Getting and Setting Screen Resolution
Find out the current screen resolution for your desktop.
Change it to something else, and change it back to its original value.
NOTE: You can also ascertain your current resolution by typing at the command line:
student:/tmp> $ xdpyinfo | grep dim
dimensions: 3200×1080 pixels (847×286 millimeters)
Solution
Click either the gear or tool icon in the top right corner, depending on your distribution, and select System Settings.
Click on either Displays or Devices > Displays. The resolution dropdown should be evident and intuitive to use.
Working with Time Settings
Change the timezone of your system to London time (or New York time, if you are currently in London time). How does the displayed time change?
After noting the time change, change the timezone back to your local timezone.
Solution
On a GNOME desktop, click on System Settings > Date & Time or System Settings > Details > Date & Time, and note the current Location settings.
You will either have to click on Unlock to give the root password, or will be asked for it when you try to change the timezone, depending on your GNOME version.
Use the Region and City dropdowns to switch the region to Europe and the city to London, or type London into the Location widget and pick the proper location from the list that appears. (You may also just be able to click at the right place on a map of the world.)
Look at the clock, and note that the displayed time has changed. Now, set the timezone back in the same way.
On KDE desktops, the details are somewhat different, but it is not difficult to figure out how to do this, and it should take you less time to find the configuration methods than it does to describe them.
Network Manager
Network Configuration
All Linux distributions have network configuration files, but file formats and locations can differ from one distribution to another. Hand editing of these files can handle quite complicated setups, but is not very dynamic or easy to learn and use. Network Manager was developed to make things easier and more uniform across distributions. It can list all available networks (both wired and wireless), allow the choice of a wired, wireless, or mobile broadband network, handle passwords, and set up Virtual Private Networks (VPNs). Except for unusual situations, it is generally best to let Network Manager establish your connections and keep track of your settings.
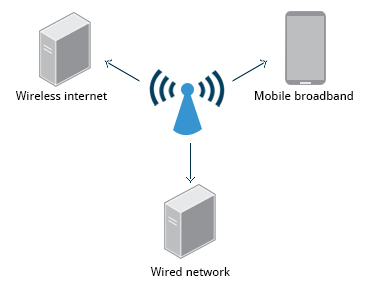
In this section, you will learn how to manage network connections, including wired and wireless connections, and mobile broadband and VPN connections.
Wired and Wireless Connections
Wired connections usually do not require complicated or manual configuration. The hardware interface and signal presence are automatically detected, and then Network Manager sets the actual network settings via Dynamic Host Configuration Protocol (DHCP).
For static configurations that do not use DHCP, manual setup can also be done easily through Network Manager. You can also change the Ethernet Media Access Control (MAC) address if your hardware supports it. The MAC address is a unique hexadecimal number of your network card.

Wireless networks are usually not connected by default. You can view the list of available wireless networks and see which one (if any) you are currently connected to by using Network Manager. You can then add, edit, or remove known wireless networks, and also specify which ones you want connected by default when present.
Configuring Wireless Connections
To configure a wireless network in any recent GNOME-based distribution:
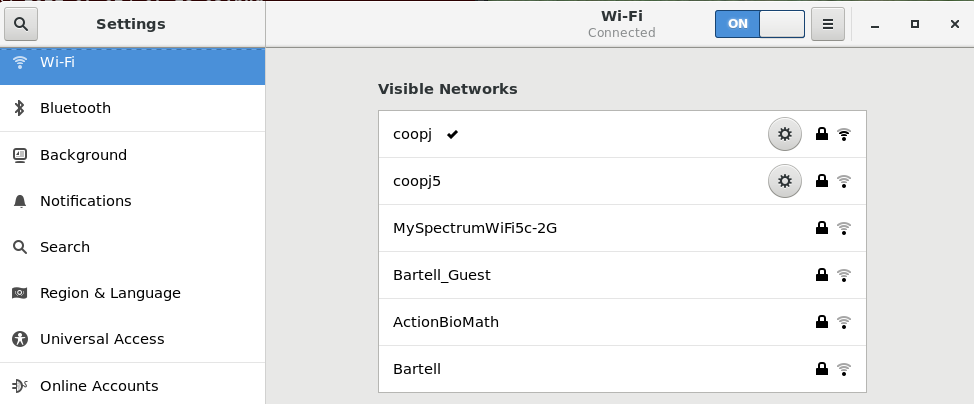
Click on the upper-right corner of the top panel, which brings up a settings and/or network window. While the exact appearance will depend on Linux distribution and version, it will always be possible to click on a Wi-Fi submenu, as long as the hardware is present. Here is an example from a RHEL 8 system:
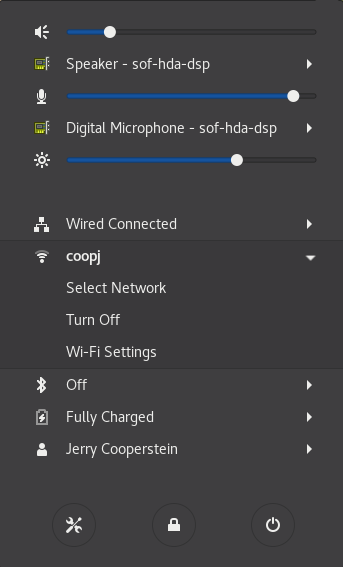
Select the wireless network you wish to connect to. If it is a secure network, the first time it will request that you enter the appropriate password. By default, the password will be saved for subsequent connections.
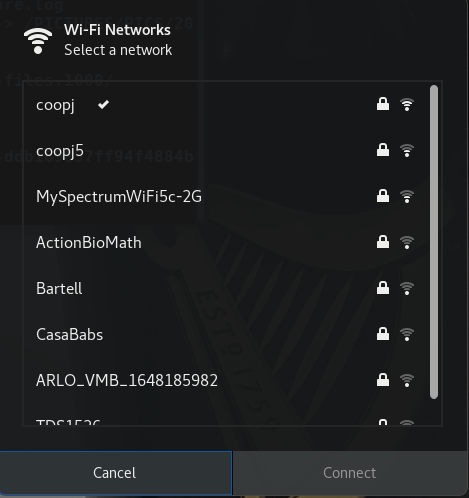
If you click on Wi-Fi Settings, you will bring up the third screenshot. If you click on the Gear icon for any connection, you can configure it in more detail.
Older and other Linux distributions may look quite a bit different in detail, but the steps and choices are essentially identical, as they are all running Network Manager with perhaps somewhat different clothing.
Mobile Broadband and VPN Connections
You can set up a mobile broadband connection with Network Manager, which will launch a wizard to set up the connection details for each connection.
Once the configuration is done, the network is configured automatically each time the broadband network is attached.
Network Manager can also manage your VPN connections.
It supports many VPN technologies, such as native IPSec, Cisco OpenConnect (via either the Cisco client or a native open source client), Microsoft PPTP, and OpenVPN.
You might get support for VPN as a separate package from your distributor. You need to install this package if your preferred VPN is not supported.
Installing and Updating Software
Each package in a Linux distribution provides one piece of the system, such as the Linux kernel, the C compiler, utilities for manipulating text or configuring the network, or for your favorite web browsers and email clients.
Packages often depend on each other. For example, because your email client can communicate using SSL/TLS, it will depend on a package which provides the ability to encrypt and decrypt SSL and TLS communication, and will not install unless that package is also installed at the same time.

All systems have a lower-level utility which handles the details of unpacking a package and putting the pieces in the right places. Most of the time, you will be working with a higher-level utility which knows how to download packages from the Internet and can manage dependencies and groups for you.
In this section, you will learn how to install and update software in Linux using the Debian packaging system (used by systems such as Ubuntu as well) and RPM packaging systems (which is used by both Red Hat and SUSE family systems). These are the main ones in use although there are others which work well for other distributions which are less used.
Debian Packaging
Let’s look at the Package Management for the Debian family system.
dpkg is the underlying package manager for these systems. It can install, remove, and build packages. Unlike higher-level package management systems, it does not automatically download and install packages and satisfy their dependencies.
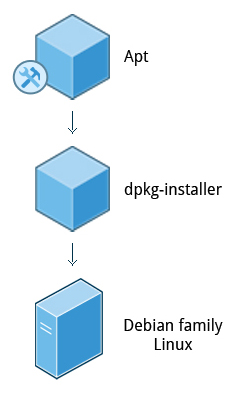
For Debian-based systems, the higher-level package management system is the Advanced Package Tool (APT) system of utilities. Generally, while each distribution within the Debian family uses APT, it creates its own user interface on top of it (for example, apt and apt-get, synaptic, gnome-software, Ubuntu Software Center, etc). Although apt repositories are generally compatible with each other, the software they contain generally is not. Therefore, most repositories target a particular distribution (like Ubuntu), and often software distributors ship with multiple repositories to support multiple distributions. Demonstrations are shown later in this section.
Red Hat Package Manager (RPM)
Red Hat Package Manager (RPM) is the other package management system popular on Linux distributions. It was developed by Red Hat, and adopted by a number of other distributions, including SUSE/openSUSE, Mageia, CentOS, Oracle Linux, and others.
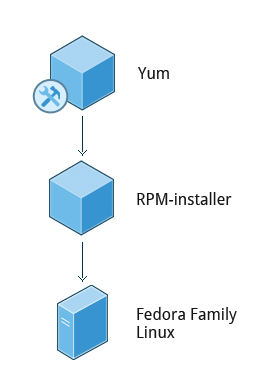
The higher-level package manager differs between distributions. Red Hat family distributions historically use RHEL/CentOS and Fedora uses dnf, while retaining good backwards compatibility with the older yum program. SUSE family distributions such as openSUSE also use RPM, but use the zypper interface.
openSUSE’s YaST Software Management
The Yet another Setup Tool (YaST) software manager is similar to other graphical package managers. It is an RPM-based application. You can add, remove, or update packages using this application very easily. To access the YaST software manager:
- Click Activities
- In the Search box, type YaST
- Click the YaST icon
- Click Software Management
You can also find YaST by clicking on Applications > Other-YaST, which is a strange place to put it.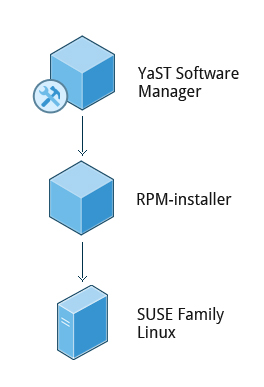
openSUSE’s YaST software management application is similar to the graphical package managers in other distributions. A demonstration of the YaST software manager is shown later in this section.
Summary
Let’s summarize the key concepts covered:
- You can control basic configuration options and desktop settings through the System Settings panel.
- Linux always uses Coordinated Universal Time (UTC) for its own internal time-keeping. You can set the date and time settings from the System Settings window.
- The Network Time Protocol is the most popular and reliable protocol for setting the local time via Internet servers.
- The Displays panel allows you to change the resolution of your display and configure multiple screens.
- Network Manager can present available wireless networks, allow the choice of a wireless or mobile broadband network, handle passwords, and set up VPNs.
- dpkg and RPM are the most popular package management systems used on Linux distributions.
- Debian distributions use dpkg and apt-based utilities for package management.
- RPM was developed by Red Hat, and adopted by a number of other distributions, including the openSUSE, Mandriva, CentOS, Oracle Linux, and others.