In the previous tutorial, we discussed the steps to create a account in Microsoft Azure and took a tour of the Azure dashboard. Here, we will show you the steps to create a Windows virtual machine in Azure and the various steps involved in the process.
Azure virtual machines (VMs) can be created through the Azure portal. This tutorial shows you how to use the Azure portal to deploy a virtual machine (VM) in Azure that runs Windows Server 2016.
If you don’t have an Azure subscription, you can create a free account by following this tutorial.
Sign in to Azure
Sign in to the Azure portal at https://portal.azure.com. After you sign in to the portal, please follow below steps:
Create virtual machine
- Choose Create a resource in the upper left-hand corner of the Azure portal.
- In the search box above the list of Azure Marketplace resources, search for and select Windows Server 2016 Datacenter, then choose Create.
- Provide a VM name, such as myVM, leave the disk type as SSD, then provide a username, such as azureuser. The password must be at least 12 characters long and meet the defined complexity requirements.

- Choose to Create new resource group, then provide a name, such as myResourceGroup. Choose your Location, then select OK.
- Select a size for the VM. You can filter by Compute type or Disk type, for example. A suggested VM size is D2s_v3. Click Select after you have chosen a size.

- On the Settings page, in Network > Network Security Group > Select public inbound ports, select HTTP and RDP (3389) from the drop-down. Leave the rest of the defaults and select OK.
- On the summary page, select Create to start the VM deployment.
- The VM is pinned to the Azure portal dashboard. Once the deployment has completed, the VM summary automatically opens.


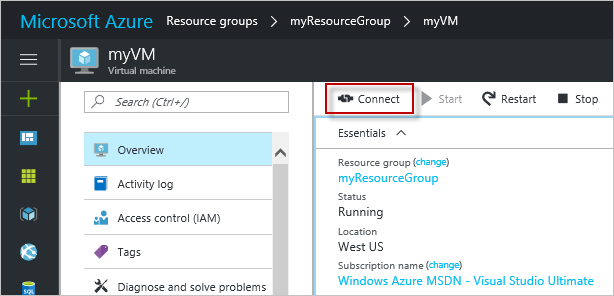
Connect to virtual machine
Once the VM is created, we need to connect (RDP) to the VM to perform further task. These directions tell you how to connect to your VM from a Windows computer. On a Mac, you need an RDP client such as this Remote Desktop Client from the Mac App Store.
- Click the Connect button on the virtual machine properties page.

- In the Connect to virtual machine page, keep the default options to connect by DNS name over port 3389 and click Download RDP file.
- Open the downloaded RDP file and click Connect when prompted.
- In the Windows Security window, select More choices and then Use a different account. Type the username as vmname\username, enter password you created for the virtual machine, and then click OK.
- You may receive a certificate warning during the sign-in process. Click Yes or Continue to create the connection.